And while I didn’t make a gif, there is detection for when you die and have no lives left, we get a nice blinking “Game Over” screen. I’ll enhance that later to go back to the title after a period of time (simple coroutine).
The trickiest part of respawning was re-enabling and resetting the state of so many different things. As a result, there is an event fired in the stage when a respawn is about to happen, and there are FIVE listeners to that event:
PlayerStateController – Re-enables movement and weaponry.
DamageController – Re-enabled the SpriteRenderer and Collider2D.
I don’t like this place for it. I considered making a separate component strictly for dealing with the animation/sprites of Mega Man, and may still go that route if I can make a clean separation.
PlayerStats – Resets the current health.
HealthController – Resets the current health in the UI.
LivesDisplay – Updates the lives count in the UI.
So many things happening. It feels a bit like spaghetti, but maybe it’s decent design: lots of separate components tracking solely what they need to track. A respawn event causes a lot of resetting, so many it’s OK there are so many listeners. I even had to keep track of the initial spawning sprite and position just so it consistently happens in the same spot.
As for the logic to restart the stage, most of that was just stopping the existing stage coroutine, and starting a fresh one. I did re-organize how the encounters are processed slightly so we can keep track and support respawning on the same wave, but it’s not a big change.
There is a bug I need to track down though. On the first death, you can’t just keep moving Rush around. But, on subsequent deaths, you can keep moving him around until you respawn. I think I prefer being able to move around Rush while waiting to respawn, so I’m going to see if I can figure out what’s the difference and adjust.
As noted on the last blog post, I adjusted some sprites to pivot from bottom to remove the need to change positions in the animation.
Up Next
A lot of the logic in the Cut Man stage script is stuff I’d want to make common amongst all stages, so I’ll probably refactor into a parent class other stages can extend from.
I’ll also add some more waves with my two new enemies (2 Eyes and Clam).
Thus far, I’ve been bumbling through animations. I haven’t really understood how they work. So, to deal with spawning, I wanted to get a little more tricky with it and try to truly figure out how certain parts of it operate. I think I have a better idea now, though definitely still bumbling through.
Sampling
All my initial animations were using 60 samples. As a result, I would time the keyframes based on that: 60 frames is one second, so if i want Mega Man to blink every 3 seconds, I would place the blinking keyframe at frame number 180 (or, in the dopesheet, 3:00). It made sense and translated to wall clock time. That said, I still had no idea what samples did or how it worked. Now I do (I think).
The number of samples is basically how many frames per second of the animation are done. For example, if you have only 3 frames in the animation, and your number of samples is 3, each frame will be visible for a third of a second. If you up the samples to 6, now each frame is visible for a sixth of a second. Basically, you can control the speed of the animation with number of samples to some degree.
I had some animations that were just a single sprite because I needed to use them as state in the animator. However, the samples were 60. This meant that every second, the animation was updating 60 times even though it was the same sprite. Yikes. Adjusting that to 1 is much more efficient.
Curves/Position
These sprites change size. For example, when Mega Man shoots, his arm extends, so the sprite width gets a few pixels wider. Things like that aren’t very noticeable, but the default is to align the sprite’s middle point with the position of the object’s transform. So, if Mega Man had a sprite that had a larger height, he would extend into Rush’s sprite rather than just grow upwards. Similarly, if there was a sprite where he’s shorter, he would slightly float when transitioning to that sprite if the position was based off his standing sprite.
To resolve this, I have been adjusting sprite sizes by adding empty space.
I knew there was a position property available in the animator, but I never really figured out how to use it. Perhaps this is not the best use of it anyway, but once you add a transform position property to the animation, you can begin to tinker with the Curves tab. It allows you to adjust the position of each sample. So, if there’s a unique keyframe each sample, then you can move it in any direction you live.
Also, since we’re working with sprites, making the tangents (transitions between curve points) constant avoided the smooth movement… though it’s interesting that I can move things smoothly if I desire.
In order to figure out how much to move the sprite, I needed to understand positioning units and how that translates to pixels.
Unit Sizing
Again, I’ve been kind of bumbling around with units and sizing things, never really understanding how it translates to pixels on the screen. So, in order to the spawn animation where I had to tinker with curves, I had to know exactly what position to move to. All my sprites are 50 pixels per unit. I set them all to that in order to double their size, but I didn’t really understand why it did it.
Positioning in Unity is all by “units”; the grid on the scene window is as well. So, if a sprite is 50 pixels tall and 50 pixels wide, and you’re using 50 pixels per unit (PPU), it takes up 1 square unit. If you change PPU to 100, now it takes up only a quarter of a square unit (0.5 x 0.5 units). Since positioning is by unit, if I want to move my sprite 5 pixels, I need to convert the 5 pixels to units before adjusting.
So, for example, the spawn sprites go from a height of 66 pixels to 42, to 24, back to 66, then 50 (standing Mega Man). Since my final position is 50, I’ll size based off that:
66 is +16 pixels, but since it’s centered, we half that to +8. Since we’re at 50 PPU, that would be 0.16 units.
42 would be -0.08 units.
24 would be -0.26 units.
In Retrospect
While learning about curves and unit sizing is great, I discovered sprites can have a pivot set in the sprite editor to eliminate the need to adjust position in the animation’s curves (at least in my use case). I’ll try to adjust to use that later.
Spawning
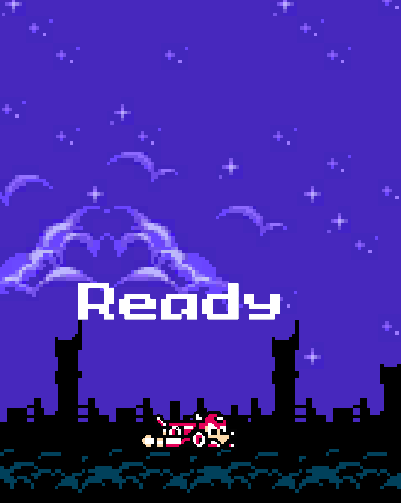
I’m getting ready to implement lives in the game, so I need a proper spawn. So far, the stage just immediately begins, but when you die and respawn, I don’t want it to just begin immediately. There should be a wind-up. So, I added a “Ready” screen: additional TMP object, blinking script, done. Since I already had some logic to blink on the title screen, I refactored that into a utility class and re-used it.
Next up was spawning. I did the whole spawn animation thing above, but the more challenging part was the drop. I figured spawning (and “Ready”) are part of a stage, so I added the logic to the stage. Once I passed in Mega Man’s animator, it was a matter of manipulating his position and triggering the spawn animation. After the spawn animation, he’s ready to go.
Initially I tried doing this in the stage’s Update, but that went quite poorly for a variety of reasons. It worked in the end, but felt clunky due to an _isSpawning flag, and the fact that we have to continually check that flag each frame. I accidentally left that code in when I committed, too. Instead, I just made it a coroutine that runs once the “Ready” coroutine is completed.
The process is:
Position him above the camera.
Disable all player input.
Flash “Ready”.
Quickly move his position down to his final resting point.
Trigger spawn animation.
I still don’t really like the solution though. Positioning him above the camera and disabling his animator seems weird to me. But it works, so I am going with it for now.
Up Next
Two things:
Lives and respawn after dying if there are lives left (and a Game Over if not).
Play with sprite pivots a bit to simplify some of what I did above.
After one weekend of waffling about what to do next, I decided to learn more about Canvas UI and managing multiple scenes. I’m not doing anything complex, but it’s something to start with.
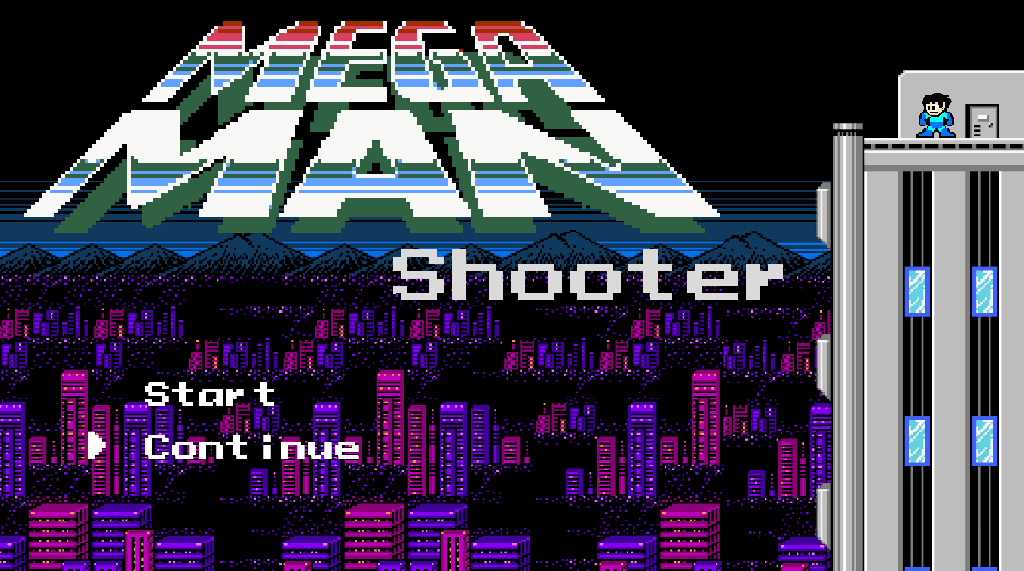
I am terrible with graphics, so I just googled some Mega Man background, a Mega Man font, and slapped them together for the title screen. I did make sure that Mega Man’s hair is whipping in the wind, at least. However, the “Start” and “Continue” text are TextMeshPro objects in Canvas, as is the selector arrow. Since I started with the title screen, this is where I did a lot of my initial learning.
Specifically, the detached selector arrow was the biggest challenge here. Initially, I added a PlayerInput component to it to track keyboard presses, and added the necessary event methods to track what happens when someone presses specific keys, moving the selector to a specific position given some array of positions. From there, the challenge became detecting which item was selected, given they were sibling objects. I hard-coded what each position does in the script, but this all seemed a bit nasty to me. Surely there’s a better way…
And then I discovered the EventSystem and its true purpose (or at least one purpose): navigation. Initially, things weren’t navigable because all I had was text, but when I adjusted them to be buttons instead (with text children), they inherently get the Selectable component (internal to the Button component, I guess) and become navigable. Not only that, but because they’re buttons, they have built in OnClick actions. This was exactly what I was looking for.
Still, the selector was a separate object, so I have to update that based on the current selection. Again, the EventSystem comes in, giving me a currentSelectedGameObject that I can use to position the selector at the button’s y coordinate. This was trivial:
private void Update()
{
    var selection = EventSystem.current.currentSelectedGameObject;
    if (selection)
    {
        transform.position = new Vector2(transform.position.x, selection.transform.position.y);
    }
}
Amusingly, the most code involved here is the blinking of the menu item before transitioning scenes. This is done by a simple coroutine in my TitleSelect component. When “Start” is selected, its OnClick event calls TitleSelect.NewGame, which begins the coroutine to blink the text. This is all wired up through Unity’s UI, which is nice. While it blinks, I disable the EventSystem as well, as we don’t want navigation happening any more. At the end, we just call the SceneLoader to load the scene specified.
Stage Select
A little more familiar with Canvas, I charged into Stage Select (after downloading some Mega Man 1 sprites). Using all the same concepts, I created buttons with images instead. Button components have a “Sprite Swap” transition that allows you to set different sprites when it’s pressed, selected, etc., which came in very useful here.
Each button has two children: the boss sprite/animation, and the name text below. Given they are children, centering everything is very easy with positioning relative to the box. Stepping back, positioning the boxes was relatively easy once I figured out relative positioning using anchors.
There are a couple scripts involved in Stage Select. Each boss object uses the StageSelectBoss component, which provides the ability to turn on/off the animation of the boss (which you can see in the gif). It also tracks the original sprite so it reverts back when not selected. With this script available, the StageSelectHighlighter component is put on the parent button, indicating what to do when selected (start animation, change text color).
Once those pair of scripts were written and working for one boss, the rest is just duplicating the structure for different bosses, and creating the different animations. This is entirely in Unity at that point, with no coding involved.
Up Next
I still want to make some UI updates to the gameplay itself, specifically tracking lives and allowing respawn. To break this into tasks:
Before beginning the first encounter, have a “Ready” thing show up.
Spawn animation after ready?
Extra life drops, and tracking lives in the UI. ScriptableObject and persistent data updates.
Track encounter progress. If there are 6 waves, and you die in wave 3, start over at wave 3.
Waves should not be entirely random. The same wave shouldn’t occur. Maybe randomly sort waves at start of stage, then go sequentially?
Also, I don’t like how my selector in the title screen is implemented. I think I’m going to make the selector a child of each menu item instead, and hide/show it based on the OnSelect and OnDeselect events, similar to how I’m dealing with Stage Select. This removes a check during Update, which seems like something ideal to avoid in game development since it executes each frame. I’ll always prefer event-based if I can. (Update: I made the adjustment.)
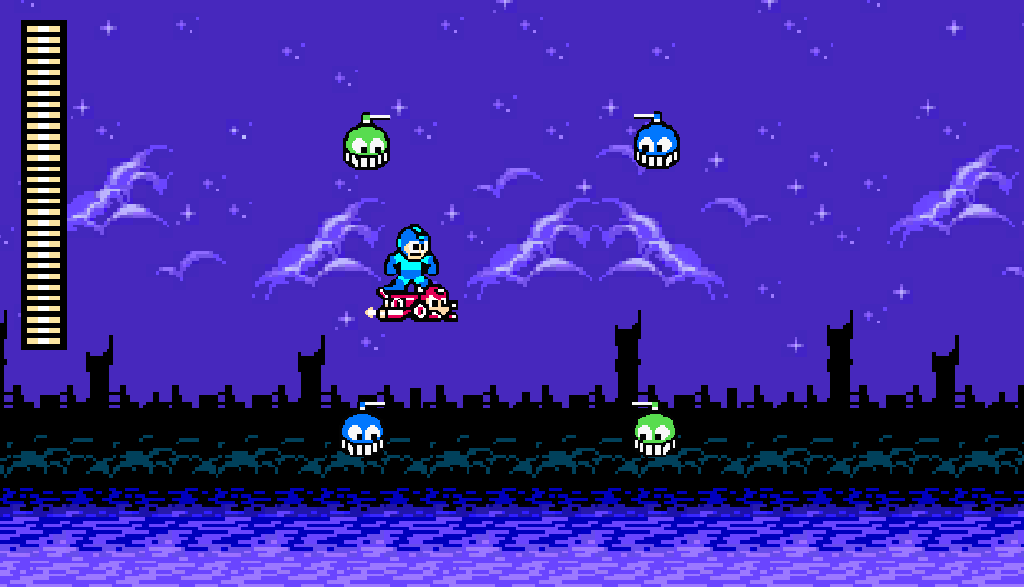
The trickiest part of all of this, and why it took me longer to do, is that the animations of these enemies should change their collider shape. It’s not immediately obvious how to deal with this in Unity. I expected there to be a simple solution (e.g. PolygonCollider2D automatically adjusts when the sprite changes), but it appears that I couldn’t find one.
In essence, the issue is that when the sprite changes shape, so should the collider. For example, looking at the “2 Eyes” enemy (the green one), when it opens up, its entire body should be vulnerable, including the eyeballs. However, if you keep that collider shape when it’s closed, empty area above/below it will remain vulnerable when it shouldn’t be.
Initially, I thought to use animation events for this. However, events fire each iteration of the animation, which felt inefficient to me. So, after some searching and asking Gemini, I arrived at using StateMachineBehaviours, attached to specific states in the Animator. When it enters the open state animation, we re-compute the PolygonCollider2D based on the physics shape of the current Sprite in the SpriteRenderer.
Sounds doable, but I quickly learned it’s never that simple. Using OnStateEnter isn’t enough, because the sprite is updated on the last frame of the animation, and it’s not updated in the SpriteRenderer when we hit OnStateEnter on the “open” state. I ended up having to use a combination of OnStateEnter and OnStateUpdate (when the SpriteRenderer is actually updated). I still feel like there should be a simpler solution out there, but I am just missing it.
As a result, we get this wicked-looking class:
public class UpdatePolygonColliderState : StateMachineBehaviour
{
    private List<Vector2> _physicsShapeVertices;
    private bool _needsUpdate;

    public override void OnStateEnter(Animator animator, AnimatorStateInfo stateInfo, int layerIndex)
    {
        _needsUpdate = true;
    }

    public override void OnStateExit(Animator animator, AnimatorStateInfo stateInfo, int layerIndex)
    {
        _needsUpdate = false;
    }

    public override void OnStateUpdate(Animator animator, AnimatorStateInfo stateInfo, int layerIndex)
    {
        if (!_needsUpdate)
        {
            return;
        }

        var collider = animator.GetComponent<PolygonCollider2D>();
        if (collider == null)
        {
            Debug.LogError($"Missing PolygonCollider2D on {animator.gameObject.name}.");
        }

        // Get the new list of vertices and set it on the collider.
        _physicsShapeVertices ??= GetPhysicsShapeVertices(animator);
        collider.SetPath(0, _physicsShapeVertices);

        _needsUpdate = false;
    }

    private List<Vector2> GetPhysicsShapeVertices(Animator animator)
    {
        var spriteRenderer = animator.GetComponent<SpriteRenderer>();
        if (spriteRenderer == null)
        {
            Debug.LogError($"Missing SpriteRenderer on {animator.gameObject.name}.");
        }

        var sprite = spriteRenderer.sprite;
        if (sprite == null)
        {
            Debug.LogError($"SpriteRenderer on {animator.gameObject.name} has no sprite.");
        }

        List<Vector2> physicsShapeVertices = new();
        sprite.GetPhysicsShape(0, physicsShapeVertices);

        return physicsShapeVertices;
    }
}
The good part here is that this’ll work for most future animations. It’s not specific to any particular sprites. So, I was able to utilize this StateMachineBehaviour for the clam enemy too. Some notes on the code:
_physicsShapeVertices is used to store the vertices in memory so we don’t have to re-compute them each time we enter the state.
_needsUpdate is used to avoid constantly resetting the collider shape every sampling of the animation.
I’m utilizing Sprite.GetPhysicsShape to grab the vertices, then using those vertices for the PolygonCollider2D‘s path.
While this seemed tedious, it did teach me about StateMachineBehaviours, and I was able to use that knowledge to help me transition an enemy from invulnerable to vulnerable state. Both of the new enemies use this (though I might change 2 Eyes to always be vulnerable). These two state behaviours flip a flag in the EnemyHealthController that controls vulnerability. If invulnerable, we ricochet the bullet and disable its collider (so it doesn’t destroy any enemies on the ricochet). Technically, in Mega Man, it ricochets at a 45 degree angle up… but I made it a bit more random. I think it’s cooler that way.
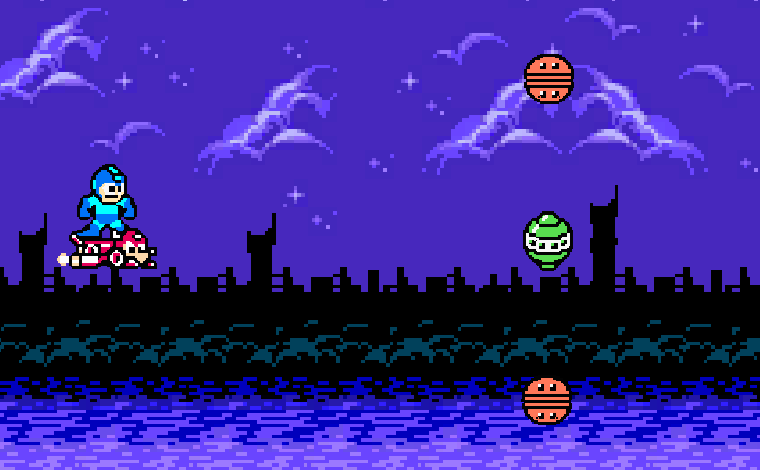
New Enemies
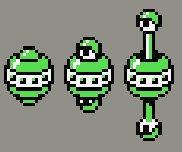
I don’t know official names of things, so I gave them arbitrary descriptive names: 2 Eyes and Clam.
2 Eyes
This is my first enemy with two guns. It also only fires once when open. So, rather than being a constant shooter, I created a ConstantEventShooter class, along with some additional properties in the ShooterData. It uses the fireRate properties, but instead of shooting at that rate, it “opens” up, triggering an animation. There is a configurable delay before it fires (compensating for the animation), and a time for how long it stays open.
The big difference is that when it fires, it instead invokes an event. The guns subscribe to the event and fire in sync with each other as a result. So, the guns have an EventShooter class as well. I couldn’t figure out a way to control this exclusively on the guns like the ConstantShooter because I need them to stay in sync (controlled by the event on the parent object), so we have two classes instead: one on the parent, and one on each gun.
I also wanted a projectile that went straight, but towards the player. I had one that went straight with an initial direction, but I wanted that direction to be based solely on the player’s positioning. Thus, StraightProjectileTowardsPlayer was born. I’ll try to figure out a way to coalesce some of these projectiles together… and I need to namespace them too.
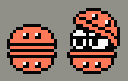
Clam
Once 2 Eyes was written, Clam required zero code. With everything componentized at this point, I just had to make the animator, setup states, and add the appropriate components to the prefab. And thus, Clam is born.
I think I’ll probably adjust its firing style to be a spread of bullets instead of a cluster, like in Mega Man. Perhaps next commit.
Up Next
I might make a couple more simple enemies and a couple more encounters.
However, after that, there are a few directions I could go:
Boss. Cut Man.
Play with tile sets and make levels something you navigate through, like Gradius.
Move UI to the bottom so it’s not on the playable area. Add scoring.
“Start” animation to begin a stage.
Stage select.
I’m leaning towards #3, then #1. I think before I do a boss, I need a place to put its health… and allocating some space at the bottom for it, outside of the playable area, seems like a prerequisite for that.
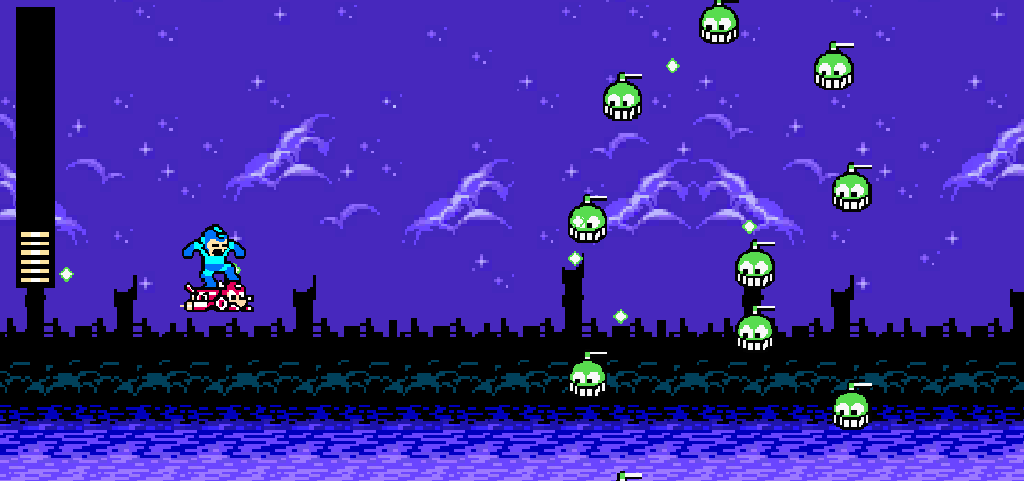
Health drops! Note that I cranked it up to a 50% chance to capture the gif above.
Enemy Refactoring
My previous post details some of the analysis paralysis I was having, but I have resolved that. Here is that commit.
Enemies used to do everything by inheritance structure, and each Enemy had only a single MonoBehaviour script it in that handled everything. The inheritance took care of a lot of stuff so the implementation only had to do so much, but as more enemies get added, the object hierarchy only gets more complex and convoluted. Oh, I need a new abstract method on the base Enemy class? Well, I guess I have to update literally every single enemy…
So, I have a new prefab for my two (currently) enemies. This prefab is one object with a child “gun” object. In the future, I will have enemies with multiple weapons that are positioned in different places on the sprite, so it’s easier to just have child objects to position where it fires from. This new prefab now has a variety of components, broken off from the original inheritance structure:
On the parent object:
EnemyHealthController – manages health and damage of the enemy.
FacingPlayer – new functionality, responsible for making sure the enemy is facing the player.
ItemDrop – responsible for dropping an item after death.
On the child gun object:
ConstantShooter – responsible for firing projectiles constantly. There will likely be various different shooting components (e.g. clamshell enemies shoot only when open). For now, just this one.
These components use ScriptableObject data, as well. Specifically, EnemyHealthController uses an implementation of EnemyData (since it has health), ConstantShooter uses an implementation of ShooterData (which implements EnemyData), and ItemDrop uses a DropRateData.
Lots of advantages to this new model:
ScriptableObjects can save on memory since all of the same enemy pull from the same data.
If I don’t want an enemy to do something (e.g. drop items), I just don’t add that component to it. Easy.
Adding enemies, as long as the component is there, is as simple as making a ScriptableObject and adding whatever components I need. If I need different functionality, I just don’t include one of the existing components and write a new one, since everything is nicely decoupled.
Child gun objects can be placed anywhere on the prefab, so it can now fire from anywhere.
You can look at the commit, and examine the classes that were removed (Enemy, Chopper, ChopperBlue, ChopperGreen) and those that were added (Components and Data inside Scripts/Enemies). Too much code to paste here!
Healing
Since I finished the refactoring faster than expected on Saturday, I had to decide what I wanted to do with my Sunday. I decided to add health drops. Here is the commit for this addition.
I started with a ScriptableObject for restorative items (this will also be used for weapon energy later):
[CreateAssetMenu(fileName = "RestoreData", menuName = "Items/Restore")]
public class RestoreData : ScriptableObject
{
    [SerializeField] private int amount;
    [SerializeField] private float expireTime = 10f;

    public int GetAmount => amount;
    public float ExpireTime => expireTime;
}
I followed that up by making a prefab and animation for a large and small health item. They each have a different ScriptableObject since the restore a different amount. The prefab isn’t terribly interesting, but it does have a BoxCollider2D since we need to detect Mega Man running into it. Since we do need to detect Mega Man specifically, I tagged the player prefab with the “Player” tag to make it easy.
Basically, if the player collides with a HealthItem, we fire an event to heal from my PlayerStats singleton, and the HealthController will take it from there:
The HealthController is where most of the action takes place. As you may or may not know, when Mega Man heals in games, the world stops and his health bar fills quickly. Everyone who’s played Mega Man knows that glorious sound of collecting a heal. However, as we also know, his health is repesented by small bars, and there is no such thing as a half bar, so a smooth filling will look very un-Mega Man like.
And thus, we arrive and this beastly coroutine:
public void AddHealth(int currentHealth, int maxHealth)
{
    StartCoroutine(FillBar(healthBar, currentHealth, maxHealth));
}

private IEnumerator FillBar(Image bar, float currentHealth, float maxHealth)
{
    // Pause everything.
    Time.timeScale = 0f;

    var currentRatio = bar.rectTransform.sizeDelta.y / _originalHeight;
    var endRatio = Mathf.Clamp(currentHealth / maxHealth, 0, 1);
    while (currentRatio < endRatio)
    {
        currentRatio += Constants.HealthStep;
        bar.rectTransform.sizeDelta = new Vector2(
            bar.rectTransform.sizeDelta.x, _originalHeight * currentRatio);
        yield return new WaitForSecondsRealtime(secondsPerFillLine);
    }
    bar.rectTransform.sizeDelta = new Vector2(
        bar.rectTransform.sizeDelta.x, _originalHeight * endRatio);

    // Resume everything.
    Time.timeScale = 1f;
}
We use Time.timeScale = 0f to pause the world. While paused, we can still update the UI so long as we use WaitForSecondsRealtime instead of just WaitForSeconds. We have a fill rate of 10 lines per second (or 1 line per 0.1 seconds), and there are 30 lines in his health bar. Thus, one line is 1/30th of the height of the health bar (stored in Constants.HealthStep). So, just increase the health bar by 1/30th every 0.1 seconds until you hit the intended ratio. Once everything is done, make sure the bar is correct (it should be) and get time moving again.
Looks pretty Mega Man like to me!
Also, these items can’t stick around forever, so they have an expiration time. 70% of the way to that expire time, they begin to flash… and then poof, gone. I figured all items need this functionality, so I created a base class to deal with it. Now that I think about it though, maybe the new weapon a boss drops shouldn’t disappear… so I should probably split that into a component instead. Yeah, whoops, already forgot to componentize stuff. Brain transition is hard.
Anyway, the expire coroutine is very simple since we already has a Flash utility for the warning:
Finally, enemies need to drop stuff. I decided to make a ScriptableObject that I can use to define drop rates. That said, having a drop rate for each item didn’t make sense; only one item should drop from an enemy. So, instead, we have a single drop rate, and a pool of items that an enemy can drop. Each item in that pool is given a weight. So, the algorithm basically does:
Should we drop?
If yes…
Pick a random int between 1 and the total weight of all items in the pool
Loop through items, accumulating weight.
Once the accumulated weight is larger than the random weight, then that’s our item.
For example, we have two items: small heal (weight 2), and big heal (weight 1). Total weight is 3.
We do Random.Range(1, 3) to get either a 1, 2, or 3.
Imagine it’s 2. We loop over the items, and get the small heal first. Cumulative weight is 2. Since this is >= the randomly chosen one, we get a small heal.
Imagine it’s 3. We loop over the items, get the small heal, and add 2 to the cumulative weight. However, the cumulative weight is still < the randomly chosen one, so we move onto the large healing item and add 1 more. Now it’s >= the randomly chosen one, so we get a big heal.
Anyway, the code is more concise than my description:
[CreateAssetMenu(fileName = "DropRateData", menuName = "Items/Drop Rate")]
public class DropRateData : ScriptableObject
{
    [SerializeField] private float dropRate = 0.1f;
    [SerializeField] private Drop[] drops;

    private readonly Lazy<System.Random> _random = new(
        () => new System.Random((int)DateTime.Now.Ticks));

    public GameObject GetDrop()
    {
        if (_random.Value.NextDouble() > dropRate)
        {
            return null;
        }

        var totalWeight = drops.Sum(drop => drop.Weight);

        // OK, now choose one based on the weights.
        var chosenWeight = _random.Value.Next(0, totalWeight);
        var cumulativeWeight = 0;
        foreach (var drop in drops)
        {
            cumulativeWeight += drop.Weight;
            if (chosenWeight < cumulativeWeight)
            {
                return drop.Item;
            }
        }

        return null;
    }
}
I had to do a couple extra commits (1, 2) while typing this to fix the randomness. Awake wasn’t being called at all, so _totalWeight was always zero, leading to always getting a small health. So, I swapped to calculating the totalWeight when GetDrop is called, and using System.Random with a seed (initialized lazily) instead. Seems to work!
How that we have a ScriptableObject to handle drop pools, I just made a DefaultDrops instance with just my two health items, and stuck that into an ItemDrop component added to each enemy. The component is very simple:
public class ItemDrop : MonoBehaviour
{
    [SerializeField] private DropRateData dropRateData;

    public void DropItem()
    {
        var item = dropRateData.GetDrop();
        if (item == null)
        {
            return;
        }
        Instantiate(item, transform.position, Quaternion.identity);
    }
}
… and voilà! Customizable drops (based on the ScriptableObject) for each enemy in a generic component.
Up Next
I want to make some new enemies. In particular, this guy:
Or this guy:
They both have some unique properties:
The each fire only when open.
The first one…
fires from two points.
fires only straight, not aimed.
The clamshell (second one)…
is invulnerable until open.
fires in a spread pattern.
More components, it seems! Hopefully the framework I’ve setup makes it relatively simple, but this will be the real test.
I’m back, an am working on a refactoring of my enemies. I only have two right now, but plan for many more, and I want whatever system I put in place to be scalable and using industry standards (as much as reasonable). I have a few goals of the refactoring:
Break enemies down into components, e.g. health management, attack pattern, etc.
Reduce inheritance. Breaking the enemies down will effectively do that.
Use ScriptableObjects for static enemy data.
Spawn projectiles from enemies from a child game object, rather than the enemy game object. This will allow multiple, customizable firing points on a future enemy.
However, as with any refactoring, I’m a bit paralyzed in the best approach when considering future enemies that I want to add.
ScriptableObject Paralysis
My first area of contention is regarding the ScriptableObjects. Currently I have a base EnemyData class with some very common fields for an enemy:
namespace Enemies
{
    public class EnemyData : ScriptableObject
    {
        [SerializeField] private string displayName;
        [SerializeField] private int health;
        [SerializeField] private float moveSpeed;

        public string GetDisplayName => displayName;
        public int GetHealth => health;
        public float GetMoveSpeed => moveSpeed;
    }
}
From there, I have ChopperData which can apply to both my green and blue Chopper enemies:
ChopperData seems generic enough for any enemy that files a single projectile within an interval.
Blue choppers, specifically, fire a cluster of shots in succession. Ideally, that’s configurable in the ScriptableObject, but I’m unsure whether to…
… extend ChopperData (or whatever I rename it to) to add the additional configurable? Starting to get tied to inheritance again.
… create a new extension of EnemyData that has the same fields as ChopperData, with additional fields? Duplicate fields.
… add the additional fields to ChopperData? For example, shotClusterSize = 1 for green Choppers, and 3 for blue. (leaning towards this option)
Additional configuration for enemies that do spread shots, or don’t fire on intervals, instead triggering on something else (e.g. clamshell enemies only shoot when open).
MonoBehaviour Paralysis
When breaking down the enemies into component MonoBehaviours, I am also a bit paralyzed.
Should the enemy health management component handle what happens when an enemy gets hit or dies? Or should I have a separate animation component?
When an enemy dies, I need it to stop attacking… so there has to be communication between components. I guess the attack component needs to subscribe to an event invoked from the health component?
Same for the animation component if I separate it?
The attack component will probably be on the child game object representing the weapon (projectile spawn point). Will those pose an issue trying to subscribe to events on components of the parent? Will this become an ugly mess?
I think I’m arriving at a reasonable solution here, and some of the questions above are a bit rhetorical, but just to give an idea of what’s going through my head. This also meshes with the ScriptableObject paralysis above and creating just a general state of paralysis to it all.
I should be able to break the paralysis by next weekend. For now, not much to add.
Behold, my mess in all its glory. Likely older stuff in this project will stay pretty disorganized and newer stuff will get progressively more organized as I learn ways to do so. Any future projects will have organization in it immediately, from lessons I’m learning here.
Nothing visually interesting to show off this week since the bulk of work has been cleaning up the back-end and experimenting with Unity events. I did fix two things though:
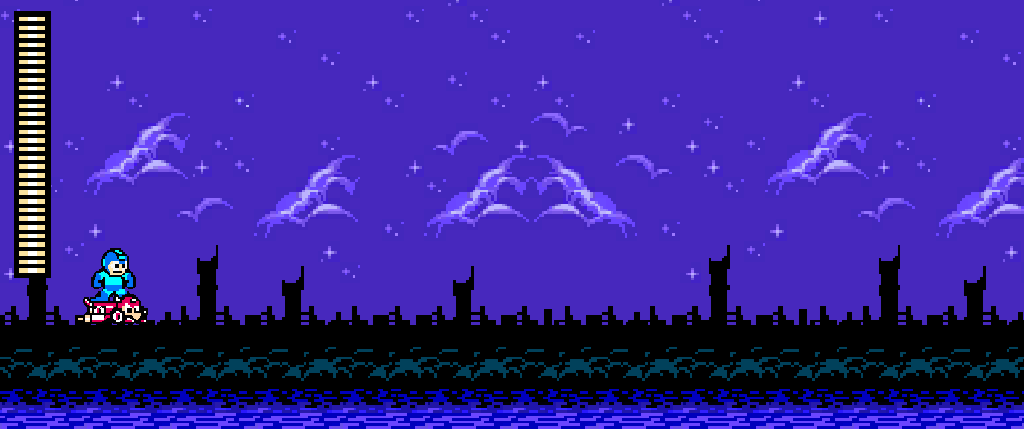
Rush now flips horizontally with Mega Man. Hmm, though now I think about it, maybe he shouldn’t since the background is moving forward… well, whatever.
When Mega Man’s invulnerability ends, any objects he’s currently on top of weren’t colliding. This means if there were a large boss or something, as long as the player stayed on top of the boss, they’d never take damage. I needed to reset the collider by disabling it, waiting a frame, and then enabling it.
Other than that, the rest is refactoring but retaining existing functionality. First, events.
Events
When Mega Man dies, enemies keep firing at where he should be. I don’t really like this; they should stop firing. However, constantly detecting if Mega Man is alive or now is inefficient. Instead, enemies should get an event whenever he dies and stop firing as a result.
On top of that, I wanted to externalize his health (and in the future, weapon inventory and lives) so it can carry over from scene to scene. If the health is externalized, then whenever he takes damage, I should be able to send out an event so Mega Man knows he needs to trigger the damage animation and go invulnerable for a period, and the UI needs to know to reduce his health bar.
Given these use cases, the first step is creating a singleton for his health. To do that, I had to learn C#’s singleton pattern, relative to Java’s. It seems like they provide some syntax to help out, so that’s good. Anyway, the basic object:
public class PlayerStats : MonoBehaviour
{
    [SerializeField] private int maxHealth;

    private int _currentHealth;

    public static PlayerStats Instance { get; private set; }

    private void Awake()
    {
        if (Instance == null)
        {
            // Set the instance only once, and do not destroy it.
            Instance = this;
            DontDestroyOnLoad(gameObject);
            _currentHealth = maxHealth;
        }
        else
        {
            // Another scene tried to create this, so destroy the duplicate (this new one).
            Destroy(gameObject);
        }
    }
}
Cool, cool. Now, whenever Mega Man takes damage (and only the collider on his game object will know this), we need to call a method in this new singleton to send out events to any subscribers. There are two events I want here:
Damage taken.
Dead.
The damage taken event will send out the current and max health, specifically for the UI to be able to calculate the percentage left. For death, there is no info other than he’s dead. So, we add this to our new singleton:
[System.Serializable]
public class PlayerDamageEvent : UnityEvent<int, int> { }

public class PlayerStats : MonoBehaviour
{
    [SerializeField] private PlayerDamageEvent onDamageTaken;
    [SerializeField] public UnityEvent onDeath;

    public void TakeDamage(int damage)
    {
        _currentHealth = Mathf.Max(_currentHealth - damage, 0);
        onDamageTaken.Invoke(_currentHealth, maxHealth);

        if (_currentHealth <= 0)
        {
            onDeath.Invoke();
        }
    }
}
Now we need subscribers.
For damage taken:
Update the health in the UI.
Trigger Mega Man’s hit animation and invulnerability.
For death:
Explode.
Disable things like shooting.
Enemies stop firing.
For updating the health in the UI, our HealthController already has everything, so we just need to add the method to the event on the persistent data. For triggering Mega Man’s invulnerability, I got rid of all the health tracking in Mega Man’s controller script (more on this later) and just end up calling a method that starts the coroutine for his invulnerability.
However, we still need to call our method in the singleton responsible for sending the event out. Only the collider’s trigger method knows how much damage we’ve received, so it has to call the method:
PlayerStats.Instance.TakeDamage((int) damage);
Now, for the death, it’s pretty easy for the exploding and disabling. We already had a Die() method in Mega Man’s single script, so we just invoke that to knock out two birds with one stone.
For enemies to stop firing, it’s slightly more complex. Because they are prefabs that get instantiated, we have to create a method to disable attacking, and add that method as a listener to the death event. Fortunately, that’s all quite simple:
And when that method is called, we simply stop the enemy’s attack routine. Easy peasy.
Overall, events will be very powerful. I plan to use them constantly in the future.
Component Refactoring
Having one single MonoBehaviour per game object is also a bad idea design-wise, and splitting into various components is easier to maintain. I’ve noticed Mega Man’s script is getting lengthy and fetches lots of components (6), so it was ripe for splitting into components.
So, I split my MegaManController into a DamageController, MovementController, and ShootingController. I’ve also taken the opportunity to namespace them into the Player namespace, too. The separated responsibilities should make things easier to maintain:
DamageController – What happens when Mega Man get shit. This is the biggest one, and still needs the SpriteRenderer, Animator, Collider2D, and AudioSource. I’ll try to think of a way to break it even further if I can (maybe an AudioController?).
MovementController – Handles movement (duh) and flipping him horizontally. I actually moved this up from the child Mega Man object to the parent Player object, and gotten rid of the PlayerController that was on the parent Player object. A side effect of this was that Rush now flips with Mega Man (since he is also a child of Player).
ShootingController – Pretty much just handles the shooting animation and nothing else. The WeaponController is already a separate MonoBehaviour on the Gun object (child of Mega Man), and that’s repsonsible for spawning bullets. That said, this hierarchy may change when I begin to have multiple weapons.
Once it’s split and I’ve replaced all the necessary components, I just had to bind the events to the new components instead:
Everything appears functional, though I did learn that un-checking a component in the Unity Editor doesn’t disable the entire script, just Update(). Kind of weird, but whatever.
Up Next
I want to start learning about ScriptableObjects, especially for my enemies. So my next task will probably be to break enemies into components and have them use ScriptableObjects as well.
That said, I’ll be in England the next two weekends, so likely no progress for at least 3 weeks. No one reads this anyway, so whatever.
Not a terrible exciting update. A lot of brainstorming this weekend.
Death
Finally. He can die.
When I thought about how to do this, it was pretty simple: just make a bunch of similarly animated game objects and send them in different directions at different speeds. It’s not an animation really, just particles flying about. Doing that was simple:
private void Die()
{
    CreateDeathParticles(4);
    CreateDeathParticles(8);
}

private void CreateDeathParticles(float speed)
{
    for (var x = -1; x <= 1; x++)
    {
        for (var y = -1; y <= 1; y++)
        {
            if (x == 0 && y == 0)
            {
                continue;
            }
            Instantiate(deathParticle, transform.position, Quaternion.identity)
                .SetMovement(new Vector2(x, y), speed);
        }
    }
But a few immediate problems came up:
How do make Mega Man disappear? Destroy the game object?
How to make sure he can’t shoot any more?
The death keeps triggering. Why?
For 1 and 3, we had to disable stuff. Easily, we can disable the game object’s immediate SpriteRenderer, PlayerInput, and Collider2D. However, while Mega Man disappeared and no longer spammed death particles every time his missing corpse got hit, he could still shoot. This is because the Gun object (and its WeaponController) was a different game object.
So, passing that as a serialized field (after adding a method to it do disable its PlayerInput) allowed me access to turn it off. I used GetComponentInChildren within Awake at first, which is a viable solution, but I switched to a serialized property for… unknown reasons. Just felt better, I guess?
Refactoring Plans
The rest of the weekend has been research and brainstorming refactoring. As the code/game is so far, it’s a mess. Game objects here and there, scripts wherever I put them, absolutely zero persistent state or state management. Just terrible.
So, I think my next goal is to establish the player’s health as a persistent object (likely a singleton), and use an event-based system to take damage and die. Obviously, to do something like this, I need to research more on Unity events and play around with their usage. But, the ultimate goal would be to establish a framework that I can use to:
Track lives.
Track weapons owned.
Restart stages from a certain point when dead.
Stage select.
… and more.
Too many things to cover at once, so I’ll start simple with the health tracking and move on from there. It’s not about health tracking (we already have that), but how it’s implemented.
I almost didn’t make a most this week because I was frustrated by the UI setup in Unity… but eventually it clicked.
First I tried Unity’s official UI tutorial. Specifically, it used the UI Toolkit, which appears to attempt to use CSS-like styling and structure for UI elements. After some searching and asking Gemini, it appears an alternative method of using a Canvas exists and has more functionality. Typically, I’d tend towards the more modern approach that Unity wants people to use, but it appears that it’s new and still expanding functions… so I decided to use a Canvas. Additionally, it appears that a simple usage like a health bar is probably quicker done in a Canvas anyway.
So, I created a new Canvas, and was disturbed by how much larger it appeared in the Scene view. I tried making a UI image object under it, and it was gigantic compared to my camera. I’d resize the object so it fits inside my camera, but then it wouldn’t appear in my game view! I had no idea what was going on… until I realized the Canvas is actually overlayed on top of the camera. The UI object might be gigantic in the Scene view, but in the Game view it appears as it should.
Once that clicked, my frustration melted away and I quickly figured out how to do what I needed to do. So, I created two UI image objects: one for the health background (just black), and one for the health fill (a tiled image). Since I’m using a tiled image (rather than filled), I have to adjust the size of the image, rather than the fill. That in mind, I quickly whipped up a script to control health:
Once I set the y-pivot to 0, anchoring in the top-left, health disappears as expected. Nice!
Overall this week, much of the time was spent figuring out and learning parts of Unity’s UI functionality, so there’s not really much else to talk about here. I think I still have a lot to learn there, but the health bar is functioning as it should, which is good.
Eventually, I’ll want health power-ups to drop so it can fill back up. Also, I think I need to adjust my health/damage settings so they’re units of health, rather than arbitrary numbers. This way, when he takes damage or gains health, the unit is always full; it would look odd to have half a unit. Ironically, my current settings don’t have that issue (or maybe the tiling is taking care of it?!).
I’m also considering moving the total health to the controller, rather than having it as part of Mega Man. Then, then function that is called on a collision with Mega Man instead communicated simply how much damage, rather than calculating the remaining health. That calculation then is constrained to the health controller. Separation of concerns and all that…
Up Next
Death. Mega Man must be able to die. I always stumble in the animations, but I think the process will be a simple death animation for Mega Man, followed by some projectiles outward which fade. The classic death animation.